Tuesday, October 9, 2012

The First Annual 4SQRP 4X4 QRP Sprint

So,
I sprinted out my cube, into the parking lot, and partook in the 4SQRP club 4X4 Sprint.
:)
Here's what that means:
20m Vertical
My job is to monitor jobs using something called CA-7. (as a comedic aside, when people ask me what I do, I tell them "I push the L button... a lot", I know, it's not funny, but this is humor in my head) Each day, the jobs start at 6pm. On Saturdays I work a 12 hour shift. When I get in, yesterday's jobs are still running. I take a half hour break sometime after they finish, and before the next set of jobs begins at 6pm. I also take a couple of 15 minute on the clock breaks. I decided that I needed to use my 2 fifteen minute breaks for set up and take down, so that's what I did. I've tried operating from the work parking lot before. Haven't exactly been successful either. Mostly there's a time problem. Half an hour isn't a lot of time to set up, operate, and tear down. I've had to adjust my scheduling so that I get outside during a break, set up the antenna, and then come outside. Fifteen minutes isn't a long time to set up. I decided that since I was without multiband blackbox radio, or multiband kit radio, I would go monoband radio, monoband antenna.  The only setup I for that right now is 20m.

I get QRV^ on twenty because some time ago, I acquired an SW-20+ from AL7FS. He had an unbuilt kit, and was offering it at a fair price on QRP-L. I decided to buy it. I swapped the Killer Watt Radio* out for this, and have been using it for a while now. Turns out, I'd been a real QRP operator with that radio, because I thought I was putting out a buck and a quarter (1.25 watts) with it, but in reality, I was putting out 250 milliwatts! I had about 5 QSOs in the log with it before the 4x4 contest. After retweaking it to put out 1 watt with 8AA batteries for a power supply, I hit the field, hoping for a QSO. When I use the bench power supply, it's about 1.8 watts. The SW+ line is most efficient at 1.25, but can usually be tweaked out to about 2.2 watts without stability issues, if you heat sink the final transistor. I may decide at some point in time to put a diode in line with the bench PS, just for the drop in supply voltage, but not just yet. The Killer Watt Radio is in the wings though, it abides, waiting for the day I aquire Molex KK crimp terminals, but when they get here, and they are installed on the ends of my connectors... it will be awesome.

I needed an antenna that required minimal fuss to get put up. I tried the St Louis Vertical before, and while it's a great antenna for field ops, it requires some fussing with to get up up correctly. I've got some ideas for fixing it up right, but it's going to be a while before I get ready to work those issues out. When I get the Killer Watt Radio back in action, I'll go back to the SLV, until then, I use a 20m vertical. I choose to use the vertical design because they 'radiate equally poorly in all directions' or something like that :) I took a collapsible fishing pole I'd been using as a field antenna for 6m when I had an FT-817, and adapted it for 20 after building the radio months ago. I quickly discovered that I had been using poor math when planning the antenna. I knew I would be using just over 16.5 feet of speaker wire when setting the antenna up. I also knew that my fishing pole was 16 foot long, and that was close enough for me. Yippee, no worries! right? Wrong! When I initially created this antenna, I created it with with an elevated feedpoint. I did this on purpose. Why, I don't remember, but I know I had a reason! That shortened the usable amount of antenna length by about two and a half feet. I decided to ditch the top part of the antenna. It's Florida, and if I'm not at the beach, chances are, there's a tree near by, so I just stretch the radiator part up, and use the tree to keep it high. At home, I was able to get the SWR down to near perfect. In the field, I find that getting the radials deployed right is a little tougher, so I use an Emtech ZM-2 antenna tuner.
Battle Station!
 I tuned up my antenna on break, and went back inside to wait for my jobs to finish running. After it finished, and after I'd done some database wranglin' in preparation for the next run of jobs, it was time to QRV. This is where I literally sprinted to the sprint. Radio operators occasionally enjoy operating in radio contests. That's when they pit their skill against radio wave propagation and try to make as many radio contacts (QSOs) as possible while following a certain set of rules. One of those rules is usually some sort of time limit. A sprint is usually 4 or fewer hours. I've even heard of a "Russian Sprint" where you Work a station, then that station takes over the frequency and you QSY, thus keeping the frequency active with new callsign. I've tried contests before from the parking lot. Mainly, they turned into learning how not to quickly deploy an antenna in the parking lot lessons. I think I'm going to try to make it a regular habit to QRV during the Spartan Sprint (SP). Back in the day, when I had the Might FT-817, I would often get QRV during 'SP', using the full QRP gallon of 5 watts. I had a lot of fun. Now that I know what I'm doing at my job, and I know that I should be able to have some time to take a lunch break in the middle of the contest, I might try to get PLP (Parking Lot Portable) some more during the SP. I tried in October, but there was no signals audible on 20m. I did call CQ though, and I did get picked up on the Reverse Beacon Net (RBN), so it was good to halfway confirm that my signal was radiating. Last week, I heard about the 4SQRP Club 4x4 Sprint, and decided I was going to give it my best effort.

20m is a Daytime band, it needs some sunshine to really be effective, and I got outside at 19:30 UTC, 3:30 pm local. Tuning around I could hear several stations calling CQ 4S, and threw my call out there to answer them. Three of them actually heard me well enough to call me back!
I worked KB4QQJ who was the loudest signal I heard, a genuine S-9 Plus, and there must have been a pipeline to his QTH in North Carolina because he gave me a 599 too. I tried really hard for about 15 minutes to work WA5BDU but just couldn't do it. He was loud, about 579, but there was QSB, and I think that's what got him down. I did work WA0ITP. WA0ITP was the weakest station I could copy. He was usually about 229, occasionally he was 559. I gave him a 229, and he gave me a 559. Unfortunately, that was it for my operating time, so QRT for me, and I clocked back in. I went back out after checking to make sure nothing had exploded, and managed to work KG3W who was 559 to me during my second 15 minute break. I tore the antenna down, and was content with my three QSOs. After the sprint, my membership in the 4SQRP club was approved, so next year I will be worth more points!
:)


When I got back inside, this dude was sitting by the badge access reader:
You Can't See Me!
Purdy neet huh?
73


^ I make extensive use of Q-codes. Q-codes are a kind of short hand when using Morse code. A list of common Q codes is here.

* The Killer Watt Radio is an SW+ on 40m, originally given to me as a gift for my birthday the year we moved to the current QTH. It may only radiate 1 watt of RF, but that 1 watt is 1 killer watt! Once again, this is humor. Laughter is appropriate.

Sunday, October 7, 2012

Tradition, A Meal and Doing New Things

This is the communion meditation for Highlands Church of Christ, as given 10/7/2012:

Tradition plays an important role in how my family does things. I got to thinking about that when I was making hotcakes for everybody. My wife reminded me of how my life has been shaped by tradition later that evening. My first name is a traditional first name for my family. Hotcakes are a traditional breakfast. I grew up going to weekly fish fry suppers at Possum Hollow, and Sunday Dinners at Grandma, and Grandpa's house. When it is the fourth of July, it is time for a family reunion, and I look forward to my 80th birthday party, that's the big party in my family. Tradition is important, it keeps the family together, and tells the stories of where we have been.

Some people are against tradition, I don't understand why, but they feel like change is coming, and that change is good. I like change every now and again my own self. Sometimes change is needed and necessary. Something may be broke, and not fixable. Something could be worn out, or inadequate for the job you are trying to do. There is a danger here though, because change for the sake of change is a dangerous thing. From what I've seen in this world, things that change too quickly do not do well. Perhaps you've heard that bit of wisdom "It's not the fall that kills you, but the sudden stop at the end." I also know that a pond that is stagnant and unchanging will die, suffocated. Somewhere between rigid unchanging repetitive motion, and constant change is life. I think tradition helps us find that. The relationship we have with God is built in tradition. When used appropriately tradition calls to mind the past good that God has done for us, and calls us to do right. When done wrong, tradition condemns us, and enslaves us. I think it helps when we establish the right tradition. The right tradition begins in Scripture, with The Good News, the Gospel. The Gospel has been present since the fall of man, and is present with us until the day of the coming of the Lord. The message hasn't changed, listen to it:

1 Corinthians 15:1-11 (ESV)

1 Now I would remind you, brothers, of the gospel I preached to you, which you received, in which you stand,  2 and by which you are being saved, if you hold fast to the word I preached to you—unless you believed in vain. 3 For I delivered to you as of first importance what I also received: that Christ died for our sins in accordance with the Scriptures,  4 that he was buried, that he was raised on the third day in accordance with the Scriptures,  5 and that he appeared to Cephas, then to the twelve.  6 Then he appeared to more than five hundred brothers at one time, most of whom are still alive, though some have fallen asleep.  7 Then he appeared to James, then to all the apostles.  8 Last of all, as to one untimely born, he appeared also to me.  9 For I am the least of the apostles, unworthy to be called an apostle, because I persecuted the church of God.  10 But by the grace of God I am what I am, and his grace toward me was not in vain. On the contrary, I worked harder than any of them, though it was not I, but the grace of God that is with me.  11 Whether then it was I or they, so we preach and so you believed.
 You see, this is our tradition! The tradition was initialized in the Garden of Eden when God promised the Crusher is coming. It was there when Jacob blessed his Children, and promised that the scepter would not depart from Judah. The Tradition was confirmed when Moses told the Hebrews to slay a lamb, and spread its blood on the lintel and doorposts. The tradition flickered, but was passed down through Isaiah during dark times, when he promised that the stump of Jesse would produce a branch that would bear fruit. The tradition came to Mary, and she was with a child even though she had no husband. The tradition lived in her son, who is the Son of God, the Prince of Peace, the Crusher, the Ruler, the Stump of Jesse, the Lamb of God. He made the tradition real and tangible on the night he was betrayed, taking bread, and calling it his body. He took a cup, and called what was in it his blood, the seal of the new covenant. Then he made that tradition the Final Tradition, offering himself on the cross for our sins. That's the key to what we proclaim when we take the bread and cup during this time. Christ has made us a promise. His body and blood for our sins, and we share in that tradition every week.

Tradition and Innovation

Sliced Apples, Ready for Innovation


Hotcakes are a big deal in my family. One of the first things I remember cooking is hotcakes with my Grandpa. Visiting my Grandparents usually meant stuffing yourself silly with 4 inch hotcakes, buttered and soaked in cane syrup that comes in what looks like a paint can. He was smart, Grandpa, he'd keep some cane syrup blended with some Aunt Jemima put a lil dollup on top, and a couple of days later you were reaching for the full strength stuff your own self.
I try to make hotcakes once a week at least myself, usually on Saturdays when I don't have to be anywhere until noon, if not then, Sunday is the day. Sometimes it doesn't work out, and I miss a week, but I try.
I made some regular hotcakes this Saturday, then got to looking at who was left to feed, and what I had to work with. I decided that since it was just my wife and I left to feed, I would try something innovative. I had some apples, and wondered if I could make something special. I sliced them thin, and covered them in cinnamon and sugar, we keep some mixed up and handy for a quick 'cinnamon toast' snack. Then I decided to fry the apples in butter in the official hotcake pan of the Hoyt House:

Fry!
  I use a black iron flat pan, made in America, and in my possession since my college days. Cooking hotcakes on black iron is the right way to do it, no teflon, stainless, or anything else will do. The key to cooking anything on iron is using lots of butter, and keeping the temp low. The iron is a massive heat sink, and helps even out the cooking, the draw back being, it takes a while to warm up, and doesn't react as quickly as stainless to temperature changes. It forces you to slow down and think about what you are cooking. It's not a bad thing, but it is a thing.  Beware of things. My idea was simple, fry apples, apply batter, and treat as a normal hotcake.
   My griddle is a size that means I normally make 3 hotcakes about 4-5 inches in diameter. I knew the apples would cook up well if sliced thin, and kept in large pieces, as is illustrated in the pictures. I gathered the apples together in the center of the pan, and poured the batter on top. When gathering the apples, I made sure to keep the apples from touching each other, seemed like it was a good idea to make sure batter could get around the apple. I did discover though, that the batter would push the apples around if you weren't careful. Next time I may fry the apples, let them cool, then put them in the batter to cook. I may also try cutting the apples some more.
 This is what yummy looks like about five minutes before serving! You can kind of see in this pic how the apples get pushed out as the batter comes down. When I was taught how to make hotcakes, I was taught that you wait for the bubbles to come up and when they are done popping, the hotcake is ready to flip. That works when you are using normal milk for your batter, but lately, we've been cutting out the milk from our diet. Now I have made my hotcake batter with water before... you will do about anything to fill your belly when you are broke and in college... Doing so by choice is just plain wrong. I decided that while orange juice was a great choice for cereal, it, like water, was also a poor choice for hotcake batter. We've supplanted our milk with almond milk, and when we first started doing that, I decided that I would try to make my hotcakes with almond milk. That is a winning choice, but it does pose some challenges.  First of all, almond milk has a slightly different flavor than regular milk. There's no sugar in standard, unsweetened almond milk. That also means that it cooks a little different. I've noticed that I need to cook the hotcakes a little longer, and I think that's because there's not as much sugar in the batter to carmelize and turn brown. I find that the hotcakes are best turned when the bubbles have stopped, and the edges of the hotcakes look a little dry. You have to be careful though, or the hotcake will dry out on the griddle.
Got to get it just right.
Flipping this thing was a challenge, that's another thing about putting apples in the mix. The apples make the hotcake kind of break up a little, but if you are careful, it can flip. On the bottom side you can really see the difference between hotcake and apple. The apple is brown, not only because it's been on the heat longer, but because the sugar carmelizes. You can taste the difference. Using unsweetened almond milk is a great choice because the sweetness of the apple really pops when you bite it. Now I'm getting ahead of myself...

I cooked the cake a little longer, when I was done, my wife was kind, and allowed me to share have of it with her. I was originally planning on giving her the whole cake, so you now see how excellent my woman is!
Yum
 After cutting in half, adding a few normal hotcakes, and adding a generous dollop of my ever dwindling supply of Henry Corley made cane syrup, I had an enjoyable meal.

Friday, October 5, 2012

Project Clean Up Part 1 Chapter 8

Chapter 8: "Walking in the Hollow State"


This is a continuation, the First part is Here,  a complete list is available under "Ham Radio Master links" on the sidebar.

Getting the power supply working, putting out good, well filtered voltage was relatively easy. The hard work was getting the radio itself QRV once again.
That's right, more problems.
Seeing that I was trying something crazy, like switching tubes, I decided that I would revert to the original two tubes, in their original sockets. Why tempt the smoke? It needed to stay in the caps this time, or money would be spent!
I put the two tubes in, confident in the knowledge that I have made QSOs with these tubes, tuned the Swan 100-MX to 3579ish, tuned the antenna on that frequency, switched antenna outlets, keyed down, and heard noise! Victory? Not quite.
 So I tried peaking the tank cap, no dice, then went investigating the tube sockets themselves again because I stopped getting any signal out when I jiggled the connection. I didn't notice anything immediately obvious, but Warmed some joints anyway, and made sure nothing was shorting anything out.


Then....


I packed up shop for the night, scowling at my fortunes.
No power, no nothing, just time for bed.
Suddenly, I had an idea!
What if one of the tubes was bad? Like the one that was still on the chassis when I smoked the radio the first time? Couldn't hurt to try right?
Sho' nuff, soon as I  switched tubes and gave it a minute to warm up, bam! power out. Then I went to bed.


 Time for the Finishing touches


I decided to button up the power supply. I clipped the primary to secondary connection to shorten the wires. The plan here was to mount the capacitors and surge resistor in the middle and the rectifier more or less on top of the secondary transformer.
More or less that's how it went.
Getting that bugger in there was tough! I had to cajole, caress, tweak and twitch over the course of two nites, but sure enough, it happened, and I was able to get that sucker in there!

Now it's time for a QSO!
That corresponds to ONE BLAZING WATT of RF on a dummy load.
On to the next project!

73,
DE KG4GVL TT-80 QRT

Thank you all for reading!

ps,
I will occasionally post followup articles to this series, and will keep a list of all the states I've worked and confirmed. My goal for this rig will be WAS or something. Look for me round about 3579KHz, in between all the digi stuff...

Friday, September 28, 2012

Project Clean Up Part 1 Chapter 7

Chapter 7: "Persnickety Power Problems Pwned and Pacified"

This is a continuation, the First part is Here,  a complete list is available under "Ham Radio Master links" on the sidebar.

Ok, so things went well in the wee hours of the morning for the power supply. I'll let the videos speak for themselves:


I had to turn the camera off to capture the results because I couldn't find a safe way to hold my camera and take the measurement. Here's the after video:


The power supply is pretty much ready to run at this point. All that is left is packaging and hooking up the radio, There's just one last check to make, the one for ZAP!
The rest of the night was pretty interesting and I have some more testing to run before I'll be ready to post.


73,

Wednesday, September 26, 2012

Project Clean Up Part 1 Chapter 6

Chapter 6: "After Action Report and Rebuild Plans"

This is a continuation, the First part is Here,  a complete list is available under "Ham Radio Master links" on the sidebar.

So Here's what I have been able to discover:
I'm still not 100% certain why the unit failed the first time. Initially I suspected the power supply, but I'm reinvestigating, I discovered another loose solder connection on one of the tube sockets. I'm not sure that's what did it, but I'm always suspicious of any changes I made. I changed tubes, the supply blew up. Thems the facts. Whether changing the tube caused a supply malfunction remains to be seen.

You can notice from the pic that I changed out the crystal holder part of the circuit. I did this to keep the metal case of the crystal WELL away from the supply voltage terminal, and because it looks better put together up and off of things as opposed to flopping around all dangly like. The bad news is my thumb is sore today because I think I poked it with a wire. If things don't improve soon, may have to go see the Dr about lockjaw! Heh!
how you 'spain that one to the XYL?
The second time the supply failed, I am 100% certain was because I used a severely underrated rectifier diode. I used a 1N4001 blindly following a misprint in the schematic I was using, instead of a 1N4004. So I'm beefing up to a 1N4005 just to make sure, and that's only IF I can't find any 1N4007's laying around the junque box. Next I will isolate the 150 B+ part of the circuit from the line, and instead of using one diode, I will go ahead and use four, building a full wave bridge rectifier. This is because I got diodes, and math is on my side...


From an awesome mess
Comes a beautiful circuit
Arise O Phoenix!

OK:
so you take a half wave rectifier like W3IRZ(sk) first designed into this rig, and you take the caps he had for smoothing, do some funny math, and using the max transformer rating of 1 amp. I'm not expecting to actually draw more than about .05 amp here, and yes, I know about derating the transformer current rating in a bridge rectifier, the actual rating is 1.2 Amp. Radio Shack sells a 3 Amp transformer too, it is part number 273-1511 you can ship it to my address from QRZ.com or hit the donate button in the top right hand corner of this webpage :)
anyway,
you do the math found at MIT: and discover that there is 24.1 Volts of ripple voltage when the load draws 1 Amp.
Now this is worst case scenario mind you, but still. at 50mA which is a lot closer to the actual current draw, it will be a lot less, like  1.205 volts ripple, which is less than 1% of peak voltage (150VDC). An acceptable number, but since the 470 microfarad caps needed to produce this performance are now BBQ in the trashcan, it's time for plan B.
I have some caps suitable for filtering, but not the exact values as before. I needed a way to lower the required amount of smoothing needed to get a usable DC voltage. I decided to build a bridge rectifier, and use a couple of caps left over from the earlier efforts. Using two 220 microfarad capacitors, I actually drop my ripple voltage a little bit, to like .95 volts at 50mA. I can handle that!
Now you can buy a bridge rectifier at the local shack, but this is an exercise in understanding, and I don't have any 1 Amp, 120Vrms AC bridge rectifiers in the Junque box. I do have 4 1N4005 diodes though, and  knowledge, and a community of assorted skalawags, errrr, electrically inclined persons who can help me out.


This is the bridge, as I have constructed it. The alligator grippers are holding it at the position where I hook in the AC, one side to top, one side to bottom.
The bridge will be hooked the  (originally primary) secondary of a 12.6VAC to 120VAC transformer.


Here's a closeup, showing the AC wires hooked into the circuit. I've intentionally left the 'ears' on the soldered circuit leads so I can do some testing later. You can see that the bands indicating the cathode of the diode are running from left to right. As it is layed out, the rectified positive voltage will be on the right, and the negative side is the left.


This is an overhead shot of the circuit so far, laid out on a potential housing mount. The pic is upside down from the way that I took it, but whatever.
you see that I have two identical transformers, they are Radio Shack "120-12.6VAC 1.2 Amp" available at most stores. I have rolled up and taped off the center tap of the transformer, because I don't plan on using it. The two outer leads have been tied together. I will take my 12 VAC filament voltage from this point. Hot and neutral wires will be hooked up to the primary transformer on the left, and the diode bridge is hooked up to the secondary transformer on the right. If all goes well, and I haven't done anything stupid, we will have pulsed DC ready for smoothing at the secondary end.
Here's a video showing how everything is currently laid out:
I won't be hooking AC up to it until I've got the unit planned out and tightened up a lil bit, namely I will be solving space issues, hooking up a switch and fuse set up, and hooking it up the way I will have it inside the box.
So what do you guys think?
Go or No Go?

Click here to continue to Chapter 7: "Persnickety Power Problem Pwned and Pacified"

73!

Monday, September 24, 2012

Project Clean Up Part 1: Chapter 5

Chapter Five: "Ecstasy and Agony"


This is a continuation, the First part is Here,  a complete list is available under "Ham Radio Master links" on the sidebar.

Good news, I made my first QSO with the Twin tube 80!

Bad news, won't be making another one any time soon!

Yay smoke!

In Chronological order, the good news first:
I made my first QSO with this rig!
Yep, it's true, actually made my first two QSO's, one with W1PID in New Hampshire, and one with AK4O down the road from me in Tampa. I got so excited, that I forgot to video the QSO w/ W1PID, even though that was my intention. Here is a vid from right after the QSO,
I felt pretty good about it!
About three hours before 9pm (local time, 0100 UTC), I announced that I would be QRV at 0100 UTC on the QRP-L reflector, the NoGA yahoo group, and other places. About 20 minutes before starting, I went out to the shack, turned on the RX rig, and plugged in the TT80, I noticed a lil' spark right as I plugged it in, looking back I think this was the beginning of the end of the capacitors in this iteration of the power supply. At the time, I didn't think anything about it because hey, tubes were glowin', and there was no smoke!
After getting some of the kids in bed, and tucked in for the night, it was radio operating time. I started calling CQ, and it seemed like almost immediately, I got a return, notably, from W1PID, click his call sign and read his adventures, they are well worth it! He takes his radios all over the place :) Considering my antenna on 80m is a W3EDP with the counterpoise unhooked (is just over 1/4 wave on 80m), and worked against my station ground, I'm glad to have worked anyone, but feel especially good that my signal made it all the way to New Hampshire!
I then took to calling CQ again. Avoiding static crashes, and other QRN, and the ever present Digi QRM, it wasn't easy, especially using the Swan as a receiver. It says "CW" on the mode selector switch, but this is a lie :) it's really the USB SSB filter working, so you hear 2.7KHz of bandwidth all at once. I've had some success using an active audio filter, but I've got a lot of work to do in the shack before I get that particular aspect of the problem solved. I have seen people homebrew CW filters to install in the Swan 100MX, but I don't know if I will yet or not.
About 20 minutes after the first QSO, I copied and replied to AK4O who lives about 36 miles from me (as the signal flies), and also got a nice email from him. I called CQ some more after that, for about an hour, without any luck.
Then, I unplugged the TT80, and tuned around some with the Swan, on 80 and 40, and decided to start trying different tubes (same type) in the sockets. you know what they say about not messin' with a good thing?


And Then:


EGADS!
Whatever went on in there, wasn't good.
hmmm,
since the first thing I did was change out a tube, I checked the tube base, and I didn't see any obvious shorts, so I began to suspect the capacitor. I remembered the extra beefy spark when I first plugged in the power supply, and I knew I had a suspect!


I found pieces of the rectifier diode, and cleaned up the box and filament transformer with simple green. That's some awesome cleaner. Then I decided to function check the filament transformer. It passed. I tested the resistance across the power surge resistor between the two capacitors: it failed. No continuity!
I then rewired up a new power supply using my last 470 microfarad 250v rated electrolytic, and a new 220 microfarad 250v electrolytic. I went to a 50ohm 10watt power surge resistor (it was as close as Radio Shack could get). Now I am ready to test things out before hooking the TT80 back up. I'm just looking for 150V dc power. Whelp, as soon as I plugged it in the 470 microfarad blew up again.
dang.
I'm throwing this cord out, grabbing another, and trying to scrounge up a couple more caps.
Until then, this project is officially on hold!

Click here to read Chapter 6: "After Action Report and Rebuild Plans"
73,

Friday, September 21, 2012

Project Clean Up Part 1 Chapter 4

Chapter 4: "Clean Up and Key Down!"


This is a continuation, the First part is Here,  a complete list is available under "Ham Radio Master links" on the sidebar.


I decided to open the power supply up, and clean up some circuitry. I wanted to make sure that things stayed put once I was ready to QRV. Here's how things looked before getting them all put together.
 Innards of the power supply. You will see in the final pic that I replaced the B+ wire, the red and black wire in this picture


and here's the transmitter:
I secured the top to the the lid using some ultra heavy duty fastener called dual lock. I wanted a rock solid mount, and I  think I got it!
I have two other plans for the transmitter that I haven't decided if I'm going to do yet or not. First, I'm thinking of replacing the clips for the crystal. I'm not really satisfied with how they connect but they are protected. Second, I'm thinking of breaking the rig down, and redoing the chassis all together. The lil' Altoids tin it's on now is showing its ten years of age.


 In this pic you can see the transformer, two filter caps, ground connection, and B+ line out. Everything is ready to be buttoned up and fed AC! The caps are mounted to the aluminium plate using mounting tape, and actually rest upside down inside the Power supply. I actually bought a 50 Ohm 10 watt resistor to go between the caps, but decided that the 45 ohm 5 watt would work better because of size. Radio Shack doesn't carry a 45 Ohm power resistor in the store, they carry a 0.47 :/
if you look closely at the power cord, it has a piece of heavy gauge magnet wire wrapped around it, this is to prevent me from accidentally pulling the cord out of the power supply, placing stress on the solder connections, and generally increasing the potential for fail.


Now for a demonstration of the awesome power of hollow state:
My theory on increase power output is that the powerbuss solder connections are better now, and tubes are awesome.
seriously on the powerbuss connection though.
Originally, in the interest of using things over and making due, I had hooked up connections with some spare wire I had laying around that at one point in time was part of a microwave. I noticed when I was hooking things up that this wire was silverish and didn't take solder well. As I remember there was no solder for power buss lines in the microwave, it used crimped terminal connections. hmmmm, probably is made from something from the lowest bidder. Fortunately, I also had some real buss wire laying around, so I replace unknown material with copper.
More copper means less power wasted heating a wire.
Here's how everything looks set up and ready to play:


no QSO yet. Will announce on twitter, QRP-L, SKCC facebook group, and other places when I get QRV.

Continue on to Chapter 5: "Ecstasy and Agony"
73!

Thursday, September 20, 2012

Project Clean Up Part 1 Chapter 3

Chapter 3: "Totally Tubluar Transmission and Technical Tidbits"


This is a continuation, the First part is Here,  a complete list is available under "Ham Radio Master links" on the sidebar.

Now that I am reasonably sure of my polarity, and I'm done cussin' the feller who put this plug together, it's time to go over the transmitter itself, and see if there's any improvement to be made. Heh. My radio uses 2 6AQ5A's in parallel. The filament takes 6 volts, and are wired in series. Right off the bat I saw that I had I had the filaments wired in parallel. This was from a time when the only transformer I could find was a 120v AC to 6v AC. I certainly corrected that lil' problem. It also explained why the sucker glowed a lil' more than I expected the first time I lit it up. 12v on a 6v filament will do that. I'm glad I didn't blow the tubes! I also cleaned up some wire and leads underneath, and made sure my point to point all went to the right places. In the process, I discovered a cold solder joint, and found a better way to route some parts.
The Kind of Ugly that's a Pretty all of it's Own


It's not necessarily my best work, but hey, it will do!
And yep, that's three 33pf NP0 capacitors wired in parallel.


Time to do some testing.
first, go see Dave Benson's website, Small Wonder Labs, and order a rockmite :) also, check out his documentation section. Download a manual for the SW-40+ transceiver, and look in the testing section. In that section is a circuit you can make pretty easily, and use it to measure the power your radio is putting out. I built mine on some radio
Circuit, dummy load, and babyfood jar.
 Prototyping board, specifically so that things would stay together. I connected the orange and yellow wire across the dummy load, and made sure that I hooked the yellow wire to the side that goes to the pin, and the orange wire to the side that goes to the ground side of the plug. At the measuring end of the plug are two posts made from surplus resistor leads, I hook my Digital VOM to them using probe hooks. The set up is hands free once you hook the probes onto the posts, and turn on the VOM.


Here's a little video about what I discovered when I measured the voltage across the dummy load:
 Ok, so, according to theory, the voltage measured here is Peak-to-Peak voltage.
Knowing that, tell me how much power is getting to the dummy load.
Show your work!

Continue on To Chapter 4: "Clean Up and Key Down"

Wednesday, September 19, 2012

Nothing Deep or Meaningful

Went to shack to take pics for post I'm working on, brought out radio. Took pics, did some prep work getting things ready for final packaging.
Turned on radio, tuned it up, tuned around...
Came time to choose, finish article, or play radio, it was time to play radio!
Worked F5IN at 05:40 UTC
Received a 569,
gave him a 579.
my power, Less than 100 watts.
Band was only meh tonight.
73!

Tuesday, September 18, 2012

Project Clean Up Part 1 Chapter 2

Chapter 2 "Why the White Wire is Hot"

This is a continuation, the First part is Here,  a complete list is available under "Ham Radio Master links" on the sidebar.

I didn't want to button my power supply up before figuring out why the hot wire was white. Basically, I wanted to make sure this radio could work anywhere, and having a hot white wire was troubling. Like David suggested in his comment, I suspected the outlet, and then the wiring in the Mains box. Time to flip breakers and do some inspecting!
First, I flipped the breaker to the shack, and trundled back into it, hoping to find a black wire where a white wire should be. The Shack in the Back was built before we moved here, and is 'unfinished'. The guy who owned the place two owners ago built it with scraps left over from some of his contracting jobs I think. When I unscrewed the socket from the recepticle, everything looked, well, fine. I was impressed with the craftsmanship of the socket to tell you the truth, connections were tight, and in the right place. Time to check the mains box, but I knew it was going to look fine there too. It did.
Back to the thinking bucket.
Yon Thinking Bucket

I juiced the shack back up, grabbed my VOM, and began doing things my mother told me not to do, namely sticking metal things in electrical outlets. By metal things, I mean VOM probes. I always feel weird sticking things into electrical outlets, makes me make sure I do so with fear, and caution. That's not a bad thing, I suppose.
First, I checked the socket for power, Hot wire to neutral, and I got 120v AC. Good!
Then I checked for what should be the neutral wire to ground, and got no AC voltage, Good!
for the kicker, I checked what should be the Hot wire to ground, and got 120v AC, Good!
So the socket is good! Should have done that first instead of assuming it wasn't... hmmm.

Next test, the power supply strip I plug into the socket. Maybe there's something miswired there,
Just checked Hotside to ground, 120v AC. Good!
So the power supply is not the issue.
must be the power cord.

The Cord- Not Polarized

notice that in the picture of the plug end, the plug is not polarized. This plug and wire was salvaged from some piece of computer equipment, and at one point in time had a female chassis mount plug on it, the kind that looks like this:

Female Chassis Mount


On a polarized plug, the narrow slot/prong is hot, the wide slot/prong is neutral and the round prong is ground, my non polarized plug fits in the socket the way a polarized one would, but, was it wired like a polarized socket? Just where did the white wire go?
I made sure the plug was unplugged, clipped the cord out of the power supply, and I decided to idiot check the green wire first, green for ground right? Switching my VOM to measure resistance, I continuity checked the green wire to the round prong, and it was Good! Then I checked between the other two wires, and no other wire lead to the round prong, Green is good!

I then oriented the plug like I was about to plug it in.

Right is hot, left is Neutral...


As this picture shows, the prong on the right, goes to the hot side of the socket. That's the one I want to check.
First I check the black wire, no continuity.
Then I check the green wire, no continuity.
Finally, I confirm that the right prong, the prong that normally connects to the hot side of the plug is connected to the white wire.
The white wire is hot because it goes to the hot side of the socket.
Heh.
I have no idea why this cord is made this way.
I just know that I can safely button up the power supply knowing It's the Cord, not my shack!

Next Up: Chapter 3: "Totally Tubluar Transmission and Technical Tidbits"
73!

Monday, September 17, 2012

Project Clean UP Part 1: Twin Tube 80


This is Chapter 1: The Power Supply!


This is part 1 of a series,  a complete list articles in this series is available under "Ham Radio Master links" on the sidebar.


Recently I've been wanting to clear various projests out of my project queue. Some of them are things I've been working on, and needed specialized parts to complete it. Others were not working because of technical issues. Some are because I'm afraid of drilling holes into some things and potentially ruining them :-)  This last week I've been working on a radio that has vexed me for for ten literal years. The radio is the NoGA Twin Tube 80 schematics and instructions available at that link. I built it as it appeared in the NoGA Compendium available here. The kit itself is no longer avaible, but the parts to build it are out there. Mike Branca W3IRZ (sk) helped me get the kit working when I was having issues with it at my house. My goal was to put it on the air for the NoGA CW net on Tuesday nites. Well, Mike gave me a lot of great advice about building radios on that trip to his shack, and at the end of the day I had a working radio. On the drive home, something affected the æther stored in the radio, and while after plugging the radio in, I got no smoke out, neither did I get any RF! Alas ! Every trick I tried played out, and I set the little tube transmitter aside for other projects. Somehow, I knew the problem was in the power supply. I suspected the large value capacitors in the rectifier circuit.
Fast forward to the present.
Every time I would look at this radio I would get sad. Sad for the loss of a friend (W3IRZ sk in 2003), and sad that I couldn't seem able to figure this thing out. I decided it was worth a try. Time to stop being sad, and get back to slingin' dits and servin' dahs.
Since I've always suspected the powersupply in this radio, I decided to just hammer away at the power supply until it was working. The way this particular rig works is that you have a 12 v ac line for the tube filaments, a 150 v dc line for the plate, and a ground that you ground through the plug. I got out my caps, diodes, resistor, plug, and began the project for the third time. After soldering everthing together, making sure to follow instructions, I took the leap and plugged it in. No smoke! I tested the 12v ac circuit. I got 13v, that's ok, the transformer output is  actually rated at 12.6v ac, so no big surprise. The 150v dc line, no dice.
Hmmmmm, this is where I left off ten years ago. I went to bed dejected and tired. I'd stayed up until 3:00am for nothing. I hadn't even learned anything yet. Course all that was going to change the next night.


I do my best to junk out old stuff so I can have strange parts when I need them, you can't buy 220 microfarad 250volt rated capacitors at radio shack. You have to go online and look them up on Mouser or Digi-Key. Fortunately, one of my recent junking exercises produced the caps I needed. This is recycling! The next night I replaced the caps and diode (just in case) double checked my wiring, plugged it in, and nothing! Still no B+ voltage. Dejected I tuned around the band hoping to find something interesting. I began thinking of what the issue could be and applied a little problem solving.

 Grabbing the VOM, I hooked the ground wire up to the black probe and began poking things with the red. Positive terminal of 470 micro farad cap, nothing, positive terminal at 220 microfarad cap, nothing. Bottom side of 1N4001 diode, nothing. Top side of 1N4001 diode, I switch to AC because I'm connected to the ground and the black (hot) wire directly, nothing. Wait, whut?
Nothing?
I have 13v ac at the transformer, between the white (neutral) and black (hot) wire I have 120v ac, but between green and black I got nothing?
Then it clicked. The black wire wasn't hot, the white wire was! Two snips and a dab or two of solder later, and I have the white wire hooked up as if it were hot, apply juice, check voltages, and we are good to go:

How's that for live action?
It's also why every shack needs a 'chicken stick' of some sort. Link takes you to a qrz.com site all about stories of chicken sticks.

So, I have power at my supply, but It's coming from a funny wire. Before buttoning everything up, I needed to figure out Why the White Wire is Hot.
That's Chapter 2!

Continue on to Chapter 2.
73,

Saturday, September 15, 2012

New Ham Radio Blog

Well, he's new to me...

Everybody that reads me has probably already found this guy,
but!
I need to tell you about M1KTA's QRP Ham Radio Blog because it is awesome.
Lots of projects
Great ones like his take on a KD1JV inspired PTO (Permeability Tuned Oscillator)
Great info on the W3EDP antenna (!)
All around, he seems like an ok fella!

I've got a project in the pipes I'm working on, and promise another update real soon.
73! (and 72)

Wednesday, July 11, 2012

July Garden Update


Man!
It's already July. I haven't done a garden update since waaaaaay long ago, so let me get you the skinny.
First of all, let me say that my particular location in "Urban Polk county" doesn't quite get the sunshine it needs to grow plants from seed I think. Every great looking tomato plant I sprouted when last I blogged about gardens damped off when the plants got about 6-9 inches tall.
There's probably a way to get around all that business, but I haven't figured it out yet.
My eggplants and cayennes all damped off too.
I did manage to get my heirloom Brandywine tomato vine to gimp along during the winter though, it didn't die till June, and probably could have gone longer, but it was growing in the compost heap, and it was time to work some compost, so it was sacrificed. The compost heap also produced an EXECELLENT! crop of cherry tomatoes from some volunteers. I couldn't believe it! There they were growing in the compost heap...
Anyway, interesting things are happening in the ol' heap. Mainly, it's getting me some GREAT compost. Every where I spread the stuff, good things start to happen. I let it get real hot mid May/June, making sure I turned it over nice and often. I had a plan for using it.
Because I can't seem to start tomatoes from seed in this location, I decided to go ahead an Grab a couple of plants at the beginning of June to plant and see what happens. I went to the local Blue themed hardware store, got some heirloom "Red Beefsteak" tomatoes, a couple of cages, and some high test dirt to make my own custom blend.
Earlier this year, I split a white barrell I saved for making a pair of potato containers, and I decided that Tomato sounded enough like potato to be grown inside them instead. I filled the bottom half with some compost from the heap, and mixed my magic dirt up, and put it on top. My idea is that the compost would provide some micronutrients, organic matter, and a moisture sponge for the growing soil to rest on. Think of it as a firm bedrock. I sunk the plants into the top of the containers and they barely reached the top of the second wire of the tomato cage. The bottom wire was at or near the soil level.
Here's how they look now:
Number 1
Number 2
We'll see if they make it out of the summer alive!

I gave them some Epsom salt this morning because the bottom looked like it was starting to yellow. Usually, this has something to do with a magnesium deficiency and Epsom salt gives the plant magnesium.


Blossoming hope for the future!
That isn't the big news though, on Sunday past, I received three plants that could change my chili perception forever!

Three Little Birds


They are Bhut Jolokias, volunteers from a FOAF, so they are in a sense, Living Urban Legends! heh!

Somehow, that seems appropriate for a plant with a name like "Ghost Chili"
 I separated the plants today, and gave them a magnesium drink too. They seemed to like it. They'll be ready to go into a container in about a week. They've just been dug up, and I want the roots to show some vigor before I try to transplant them again.
Sittin' by my Doorstep
I hope they make!
I'm going to try and find some more info on the parent plants.
Tew Be Continued.
I have further compost volunteer adventure stories to tell, complete with SCIENCE!

Sunday, June 24, 2012

Storm Season

Already we have had four named storms in this 'average' hurricane season.
How strange!
It's like the weather is unpredictable. Truth is, it's better and more profitable to prepare for the storm than to guess when and where it's going to strike. I live in Florida! There's going to be hurricanes. Preparation over prediction.
There's a time and a place to practice preparation, and this weekend is a perfect example of why preparation is important.

Debby popped up in the gulf just in time for Amateur radio field day. Every summer, during the last full weekend in June, ham radio operators make it a point to showcase their skills operating under simulated emergency conditions. Ham radio is a hobby with a point, and that point is to be available to provide emergency communications whenever and wherever necessary. You can't predict when an emergency occurs, you can only practice and prepare. Still it seems like some people would rather spend their time speculating, or even denying that the storm is coming.

I think people treat their faith in a similar fashion. Instead of preparing themselves to meet God in judgement, they either spend their time guessing when and how the judgement day will come, or they speculate that it's still a long way off. This is foolishness because judgement is coming, and God's requirements are plain: be perfect, or be forgiven, or be condemned. I don't want to be condemned by God, and it's too late for me to be perfect. All that remains is to be forgiven. That's why we partake in the Lord's Supper. 1 Corinthians 11:27-32 says:

 27 Whoever, therefore, eats the bread or drinks the cup of the Lord in an unworthy manner will be guilty of profaning the body and blood of the Lord.  28 Let a person examine himself, then, and so eat of the bread and drink of the cup.  29 For anyone who eats and drinks without discerning the body eats and drinks judgment on himself.  30 That is why many of you are weak and ill, and some have died.  31 But if we judged ourselves truly, we would not be judged.  32 But when we are judged by the Lord, we are disciplined so that we may not be condemned along with the world.
God calls us to judge ourselves now, to examine ourselves and to ask: How did I honor the covenant I made with God when I was baptized? Did I proclaim the Lord's death on the cross? Did I honor his broken body?

That's your preparation, and as you eat the bread, and drink the cup, you will be prepared, or you will be judged.

Wednesday, June 20, 2012

Psalm 46

46 God is our refuge and strength,
a very present help in trouble.
2 Therefore we will not fear though the earth gives way,
though the mountains be moved into the heart of the sea,
3 though its waters roar and foam,
though the mountains tremble at its swelling.
Selah

4 There is a river whose streams make glad the city of God,
the holy habitation of the Most High.
5 God is in the midst of her; she shall not be moved;
God will help her when morning dawns.
6 The nations rage, the kingdoms totter;
he utters his voice, the earth melts.
7 The Lord of hosts is with us;
the God of Jacob is our fortress.
Selah

8 Come, behold the works of the Lord,
how he has brought desolations on the earth.
9 He makes wars cease to the end of the earth;
he breaks the bow and shatters the spear;
he burns the chariots with fire.
10 “Be still, and know that I am God.
I will be exalted among the nations,
I will be exalted in the earth!”
11 The Lord of hosts is with us;
the God of Jacob is our fortress.
Selah


English Standard Version.
Thank you Bible Gateway!

Psalm 46 is this week's Psalm in my lil' prayer journey.

So many layers to go through with this, let's think for a minute.
Nah,
Not going to think, I'm going to trust, intentionally trust that what I perceive is known and appreciated by God, my Refuge and Strength.
I need some this week.
People that I know and love need refuge and strength.
Pray this Psalm with me today.

Monday, June 18, 2012

Time

Press play, read blog:


So I've been trying to make a point to blog and read every day, and sometimes, I start, and never finish an article, sometimes it takes more research, and I work on something for months before releasing, just because I'm doing this in my free time, but free time isn't something I really have, every minute is spent doing something, and it's only a matter of priorities. What's more important, maintaining my body, or maintaining the connection between my spirit and body, I mean, I see the trap of dualism so easily, but when I regard things from a strictly Biblical perspective, I can't acknowledge that there is a split. There is flesh, there is spirit, and they feed each other, one side just happens to like little debbies more than ideas.

I try to make my flesh submit, but I've had this idea that self-control is a focused "No" when in reality, my spirit has known that self-control is more a focused "Do". Now, in Morse code, the difference between D and N is one dit, so I'm not surprised something got lost in translation. The Stream will not allow for a QSM, it's dislinear and valve-like in relevance and manifestation.

my watch is broken, how can I run intervals if my watch is broken?
Just saying

Tuesday, June 12, 2012

"A Guide to Prayer"

When it comes to praying, I'm an irritant to myself. I remind myself to pray, and sometimes, I even remember to pray. One thing I do know is that when I focus on praying according to a program, I pray more, and my prayers mean more. I also tend to pray more often. Seeing something will remind me to pray.
I want to ask you to join me in prayer for the next several days.
I'm using something the Methodists published some time ago, it's called "A Guide to Prayer" and the publishing house is The Upper Room. It follows a liturgy and is intended for minister to use in the spiritual development of themselves. I find this book very useful when I remember to pick it up and use it :)
Here's what you do:
1. Speak an invocational prayer
2. Read a Psalm
3. Read a scripture selection
4. Read some reflective devotional material (supplied in the book).
5. Pray for the church, others, and yourself
6. Reflect on the scriptures you've read, silently, and write down your thoughts.
7. Sing a hymn
8. Pray a benediction.

The week begins on Monday, and runs to Sunday. you use Sunday to figure out where you are on this calendar. This week is Devo #33: "Christian Maturity"

Psalm is 84

Scripture reading for
Monday : Luke 18:18-30.
Tuesday : Galatians 5:16-24.
Wednesday : Philippians 2:12-18
Thursday : 1 Timothy 4:6-16
Friday : 2 Timothy 2:1-13
Saturday : 1 John 4
Sunday : 2 Samuel 1:1, 17-27; Psalms 46; 2 Corinthians 5:6-10, 14-17; Mark 4:26-34

Here's the Psalm:

84:1 How lovely is your dwelling place,

O Lord of hosts!
2 My soul longs, yes, faints
for the courts of the Lord;
my heart and flesh sing for joy
to the living God.
3 Even the sparrow finds a home,
and the swallow a nest for herself,
where she may lay her young,
at your altars, O Lord of hosts,
my King and my God.
4 Blessed are those who dwell in your house,
ever singing your praise!
Selah

5 Blessed are those whose strength is in you,
in whose heart are the highways to Zion.
6 As they go through the Valley of Baca
they make it a place of springs;
the early rain also covers it with pools.
7 They go from strength to strength;
each one appears before God in Zion.
8 O Lord God of hosts, hear my prayer;
give ear, O God of Jacob!
Selah

9 Behold our shield, O God;
look on the face of your anointed!
10 For a day in your courts is better
than a thousand elsewhere.
I would rather be a doorkeeper in the house of my God
than dwell in the tents of wickedness.
11 For the Lord God is a sun and shield;
the Lord bestows favor and honor.
No good thing does he withhold
from those who walk uprightly.
12 O Lord of hosts,
blessed is the one who trusts in you!

 From this Psalm, comes this song:

Psalms were meant to be heard as song. While incomplete, it's a good effort I think.

My goal, over the next week, is to continue this devotional and prayer book, and to do it for the week after that, etc.
I would also like you to join me in prayer, in the contemplation of Psalm 84, and in the application of scripture to the here and now.
If you would like to share insight, please do!
Tomorrow I will post some thoughts on the Scripture for the day.
My goal will be to pray and blog each day about this series of scriptures. Keep writing. Just keep writing...

Saturday, May 5, 2012

The Antennas on the Antenna Farm

Hey,
So my food garden is stinking right now. Not really stinking, I just got to figure out the magic in my yard. I get a lot of shade from the neighborhood trees. That makes for great fun for the kids playing in the back yard, but it doesn't help me growing anything at all.
That's another blog for another day.
Having a big tree in the back yard is useful for antennas though, especially if you are as much of an antenna junky as I am.  Antennas to me, represent the greatest opportunity for doing something new. I can't go out and buy all the kits, and cool radios, but I can get some speakerwire, old buttons, used pulley, tarred nylon string, paracord, or whatever, and have some fun. A tree is an environmentally friendly antenna tower! Just add wire.
There are some things to remember about trees that will affect your antenna performance.

1.  Touch the tree as little as possible with the wire. A tree is a living thing full of electrolytes in solution, and electrolytes in solution conduct RF! That means your tree can detune your antenna if it touches it. During the spring, some people even go as far as to intentionally try to load the tree itself and use it as an antenna. I've never done it, and I don't plan on it. I have enough fun with speaker wire as it is.

2. Trees that are drought stressed get weak after a heavy rain. Basically, they suck up a lot of water, and get top heavy quick. Couple that with waterlogged dirt, and if it's an ongoing wind event (like a hurricane) and it becomes easy for trees to become uprooted. Practice safety at all times! Try to make sure there is a weakpoint in your achoring system so that if the tree does go over, it will break, and won't cause damage from an anchor point pulling out.

3. As an extension of rule 1, reduce transmit power. I don't have the capability to go over 100w right now anyway, so that's fine by me. Amateur rules and regs (Part 97.313) tell us to use only the minimum power necessary to carry out reliable communication anyway. Remember the tree is alive, and too much RF is generally bad for any living creature.

4. Expect the tree to detune the antenna some. This is another application of the principles I explained in rule #1.


With those rules in mind, here are some pictures:


 This is my 2m/70cm dualband copper J-pole. Yeah, I know they aren't supposed to work, but it's what I use to hit the local stuff! I had fun making it, and I have fun using it. No I don't get any RF in my shack from it.
Who knew, right? It is mounted on an old TV antenna pole that came with the house. I moved the pole from right smack in the way outside the back door to the shack. I've used it to talk to all the local 2m repeaters using 5w on my Kenwood mobile turned shack radio.


This is another j-pole, built for 10m. As soon as I got it deployed 10m activity dried up, lol. I don't have a real measure of how well it does yet. I've used a 'super-j-pole' on 10m before, and had great results. I couldn't quite get the line high enough to deploy that antenna, so I rolled it back up, and homebrewed up a quick regular style replacement. I got the design from this site: http://kk1cw.tripod.com/buildyourownwireant.html So far, that page has been a valuable resource for me. He has several downloadable spreadsheets that you can use to calculate how to build various antennas, not just j-poles.


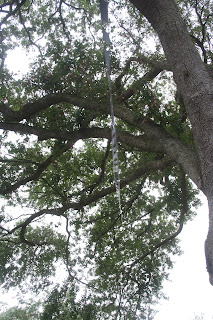
In the middle of the branch that runs left to right is a white object. That object is the balun for my 40m dipole. From there, one leg runs North by Northwest, and the other runs East by Southeast. The vee in the horizontal plane is very wide.  This antenna was the first antenna for HF I ever purchased. I got in Atlanta at Ham Radio Outlet, and originally deployed it in the attic of the church where I worked at the time. I lived next door, and if I wanted to get active, I had to go upstairs, and use the antenna there.


Same antenna, but I faced north, looked up, and shot the pic, so you could get an idea of how it runs. The line that runs across the open area is the antenna. The pic of the other side of the dipole didn't quite turn out.
That leg kind of disappoints me. It somehow got trapped on these little scraggly branches on a limb and slopes down before leveling off and running east. Nomatter my efforts, I can't seem to free that leg. If I did, no bare wire would be touching any part of the tree.


Here's the previously mentioned deployed W3EDP. My back is to the shack, and I'm facing east.


Not pictured is my 15m vertical loop. I'm considering taking it down, and reusing the mounting point for another antenna, either another loop (20m instead of 15) or using it as an experimental platform.
I need more trees!